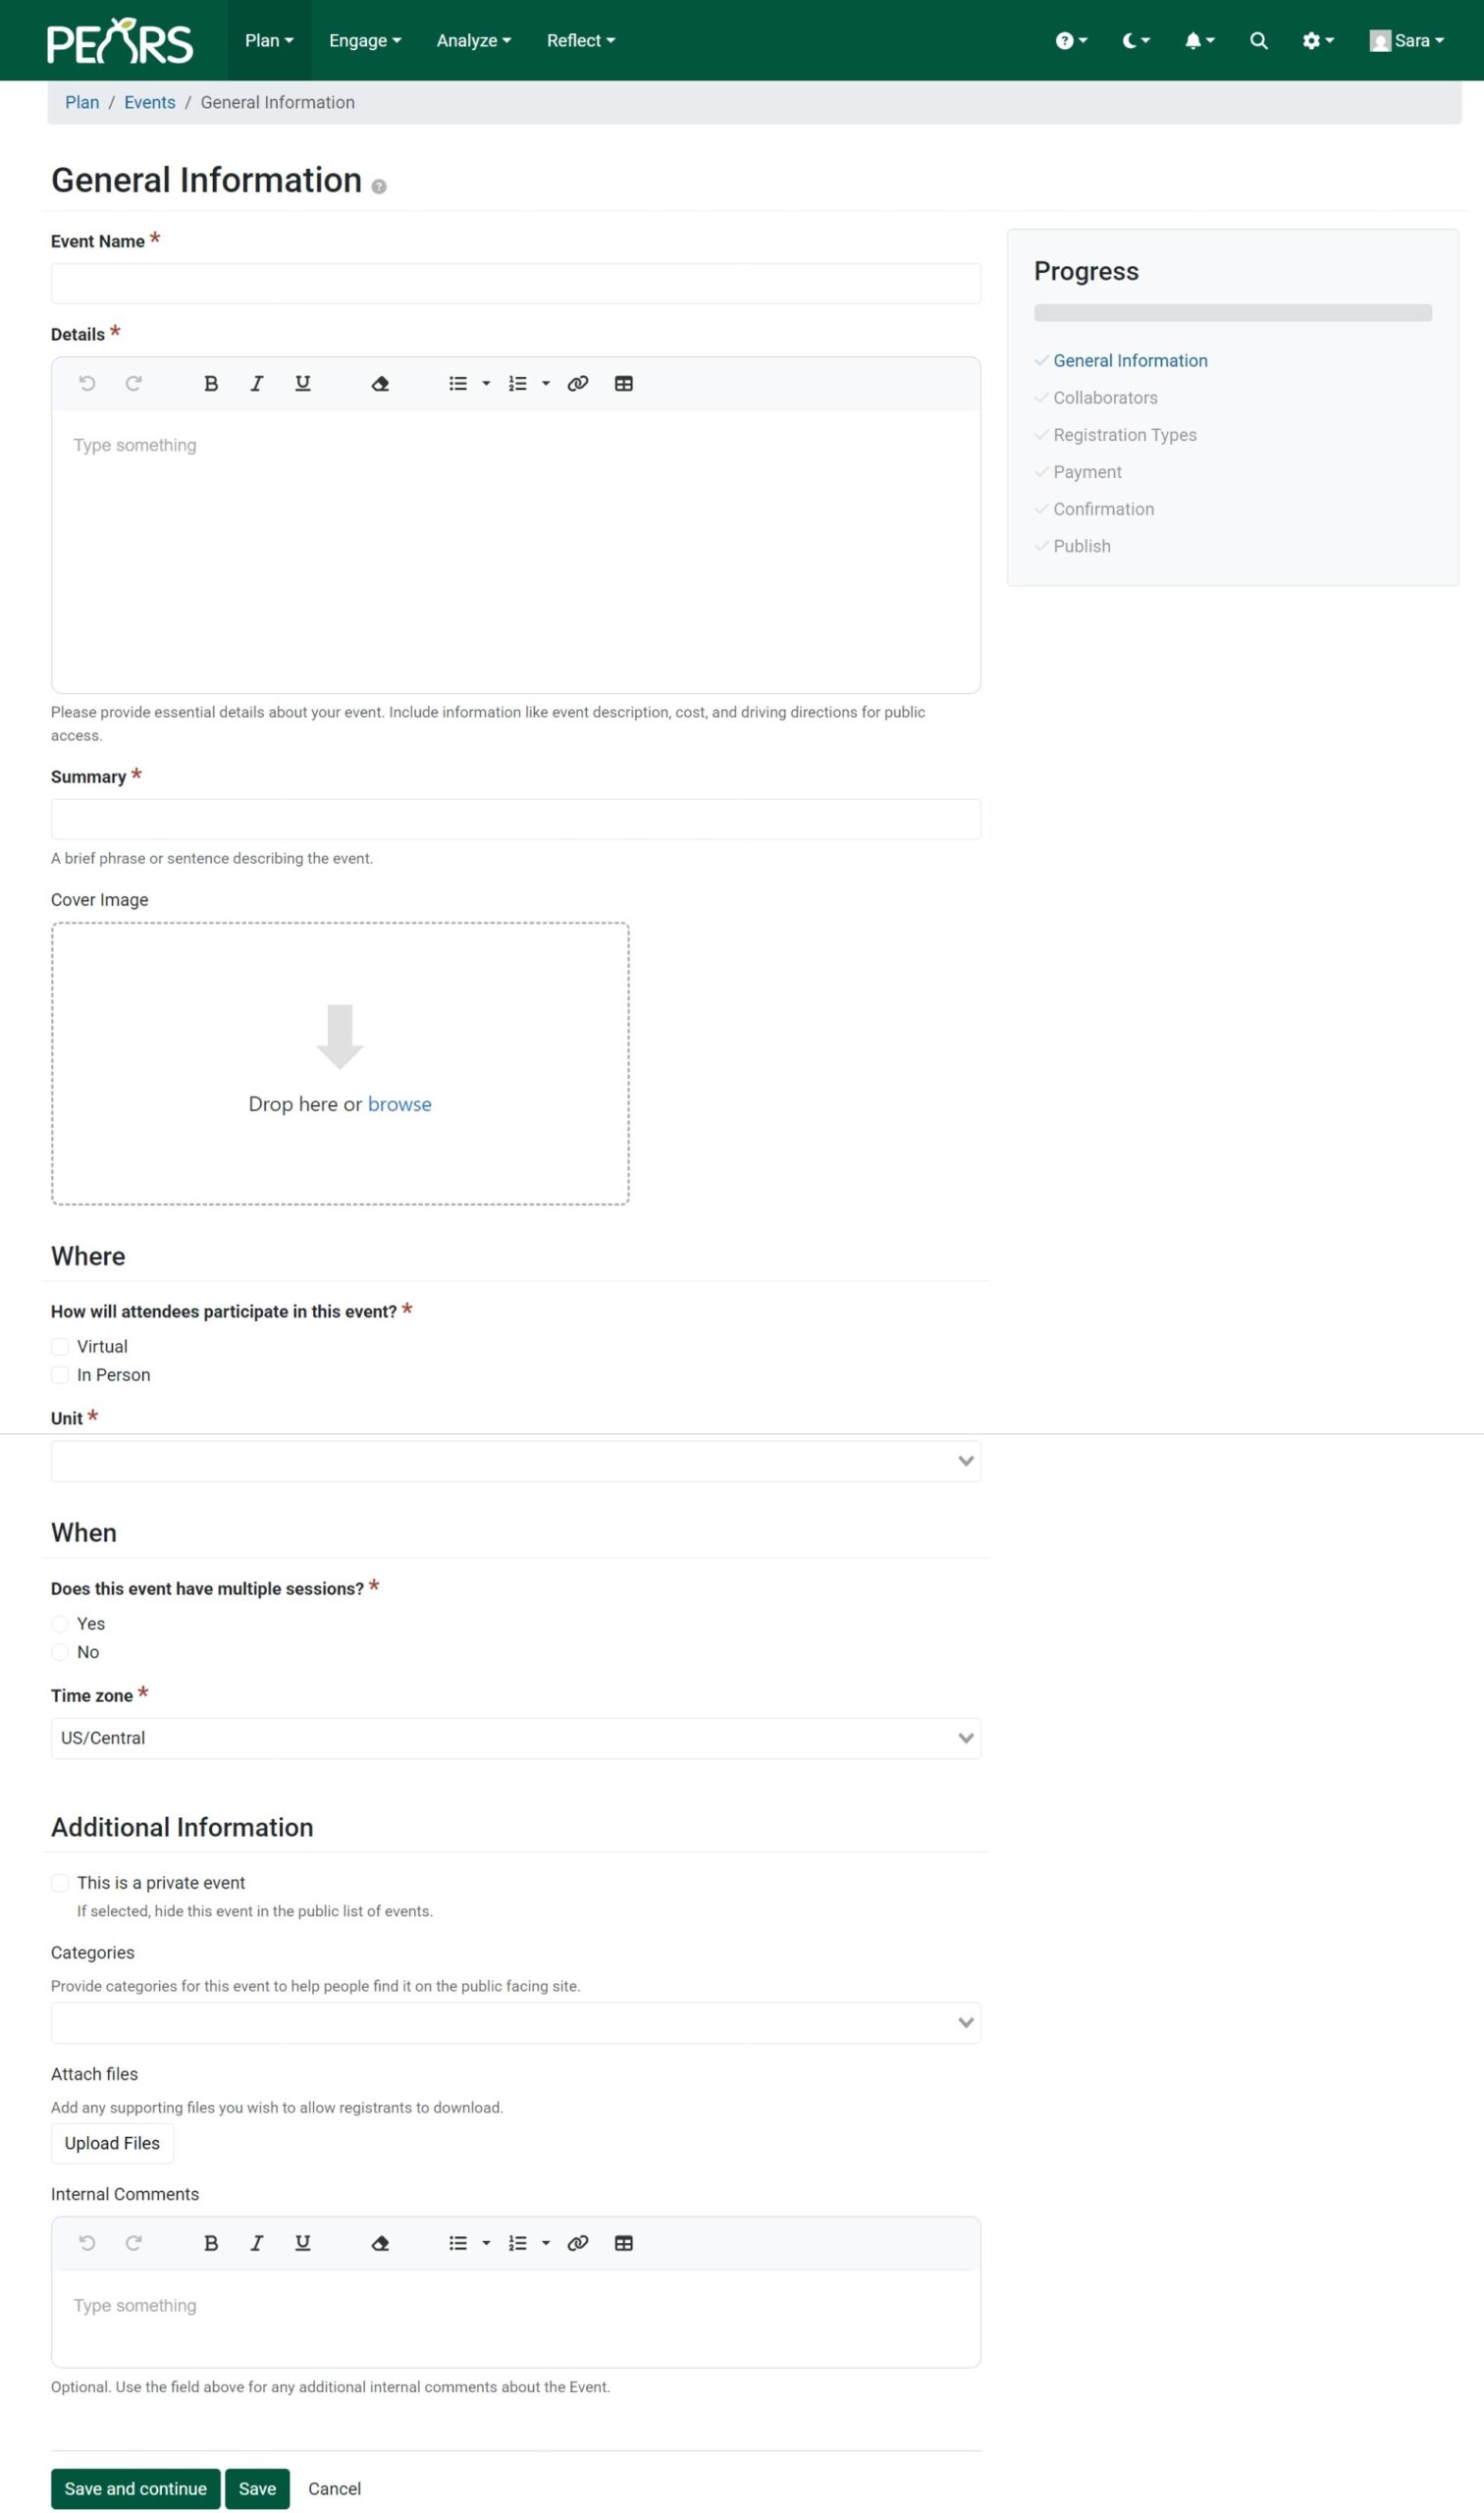
Navigate through the Plan menu to the Community Events section. Click the Add button to create a new event, opening the General Information page. Red asterisks indicate required fields. Here you will provide key event information, including a description, summary, the location, and set the start and end dates and times of the event. Optionally, enter additional information, such as file uploads that will be displayed and available for download on the public-facing event display.
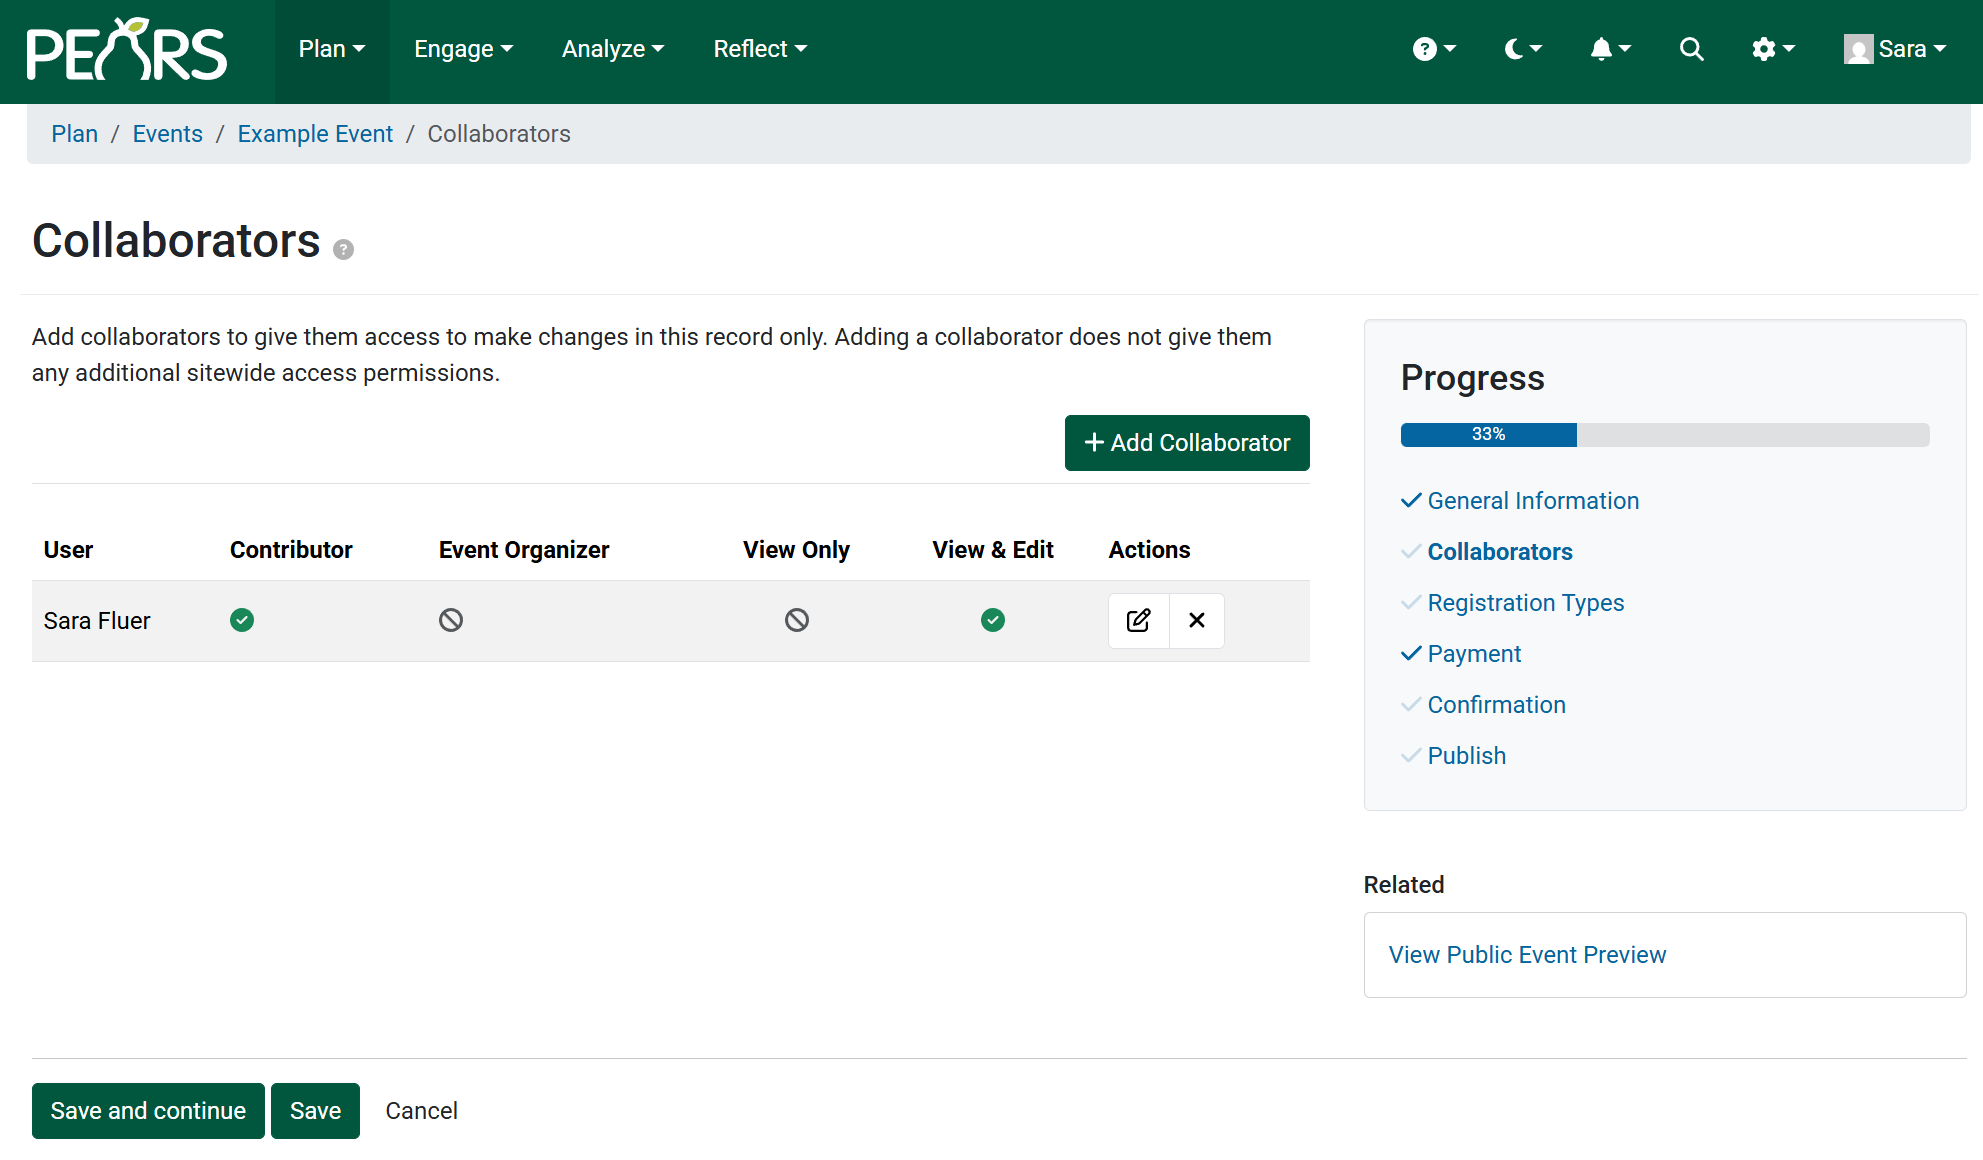
The Collaborators page allows you to add members of your organization to view only or view and edit a specific record. Adding a collaborator does not give them any additional sitewide access or permissions. Please refer to the Collaborators support document for further details.
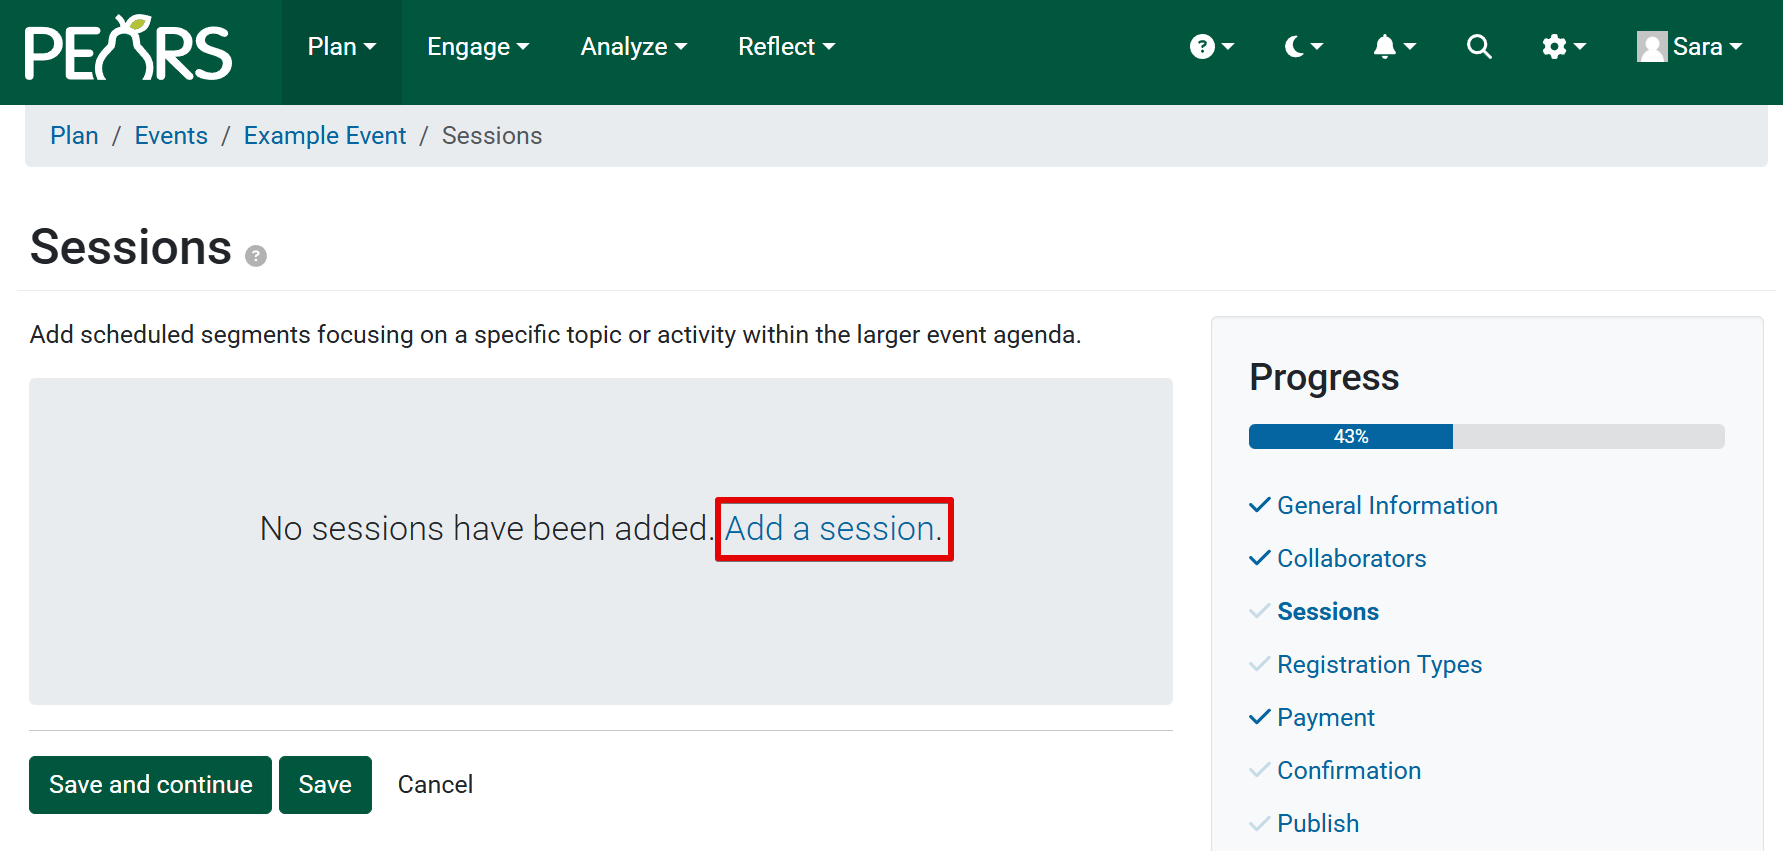
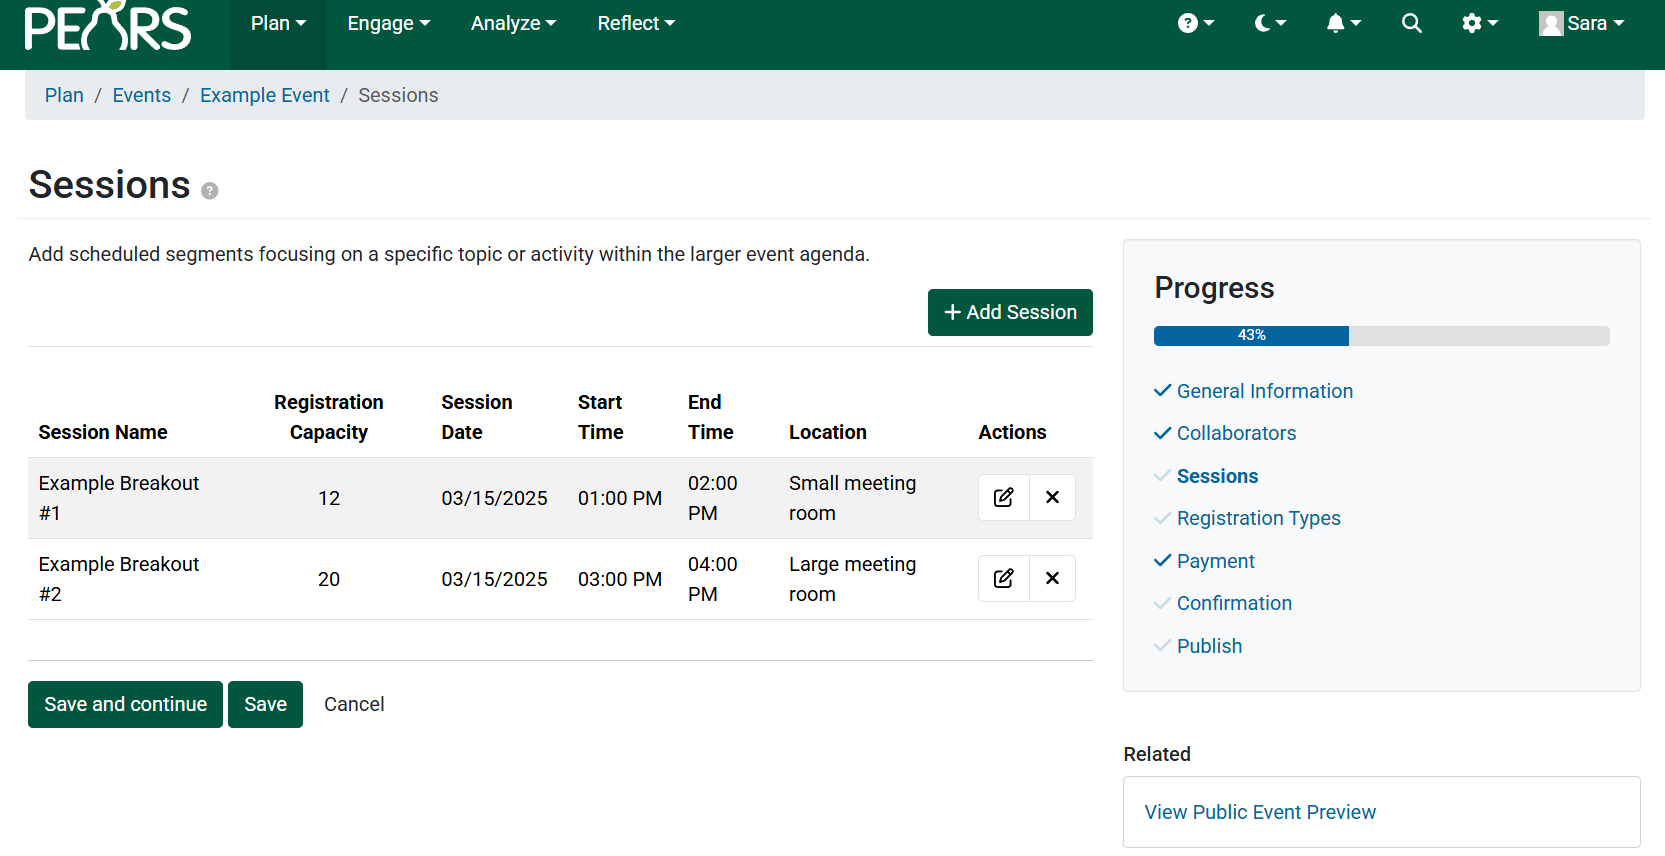
If the ‘yes‘ box was checked for multiple sessions on the General Information page, the Sessions page will be added into the event setup workflow. If the ‘no’ box was selected and the event does not have multiple sessions, this page will not be visible. To add a session, click the Add a Session button.
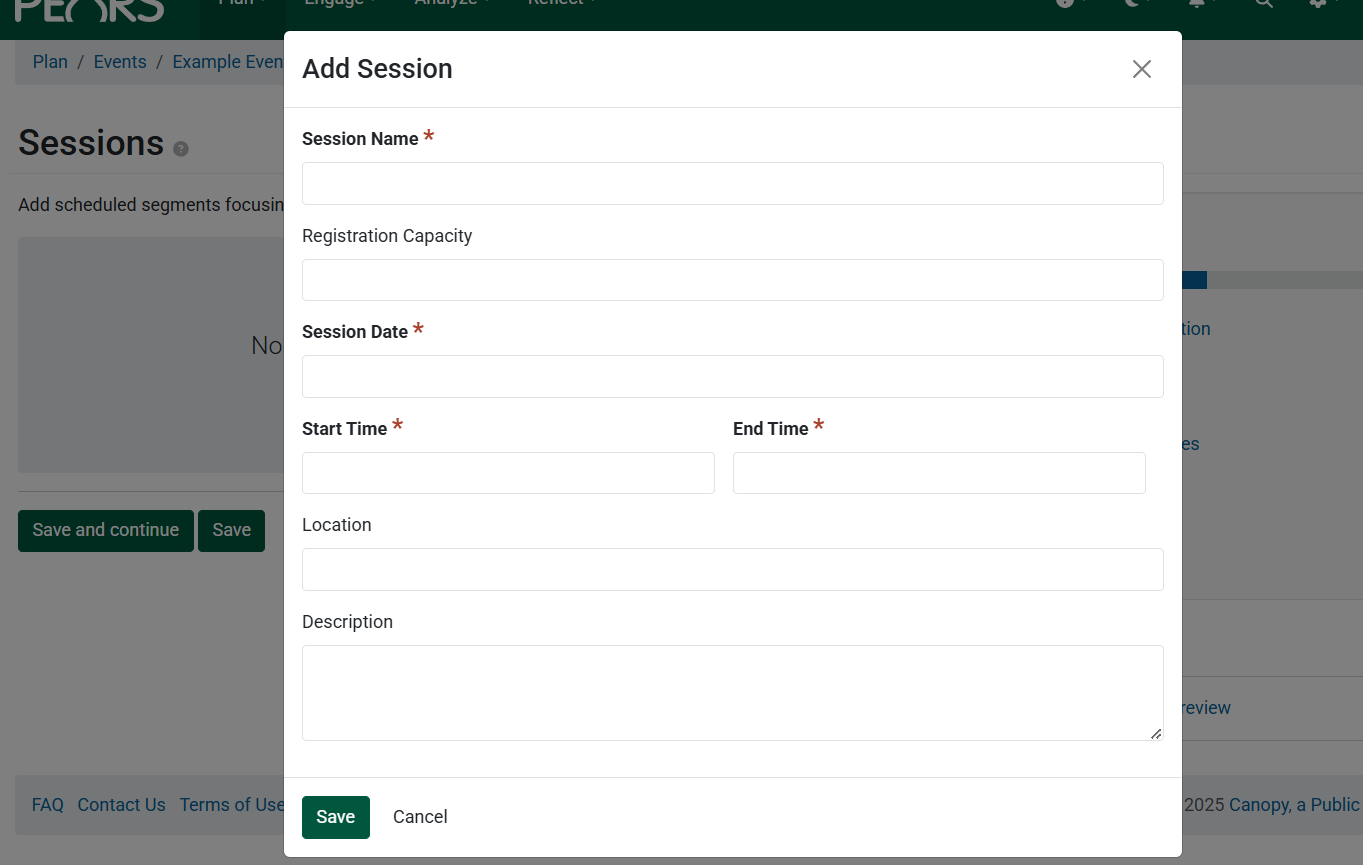
A dialogue box will appear, where session details are added. Required fields are session name, date, and start and end time. Optionally, add entries for session capacity, location, and a session description. Click Save once session details are complete.
If the event has additional sessions, repeat steps 3 and 4 until all sessions are added. Details of each session will populate into a list on the Sessions page. Once all information has been entered, click Save and Continue.
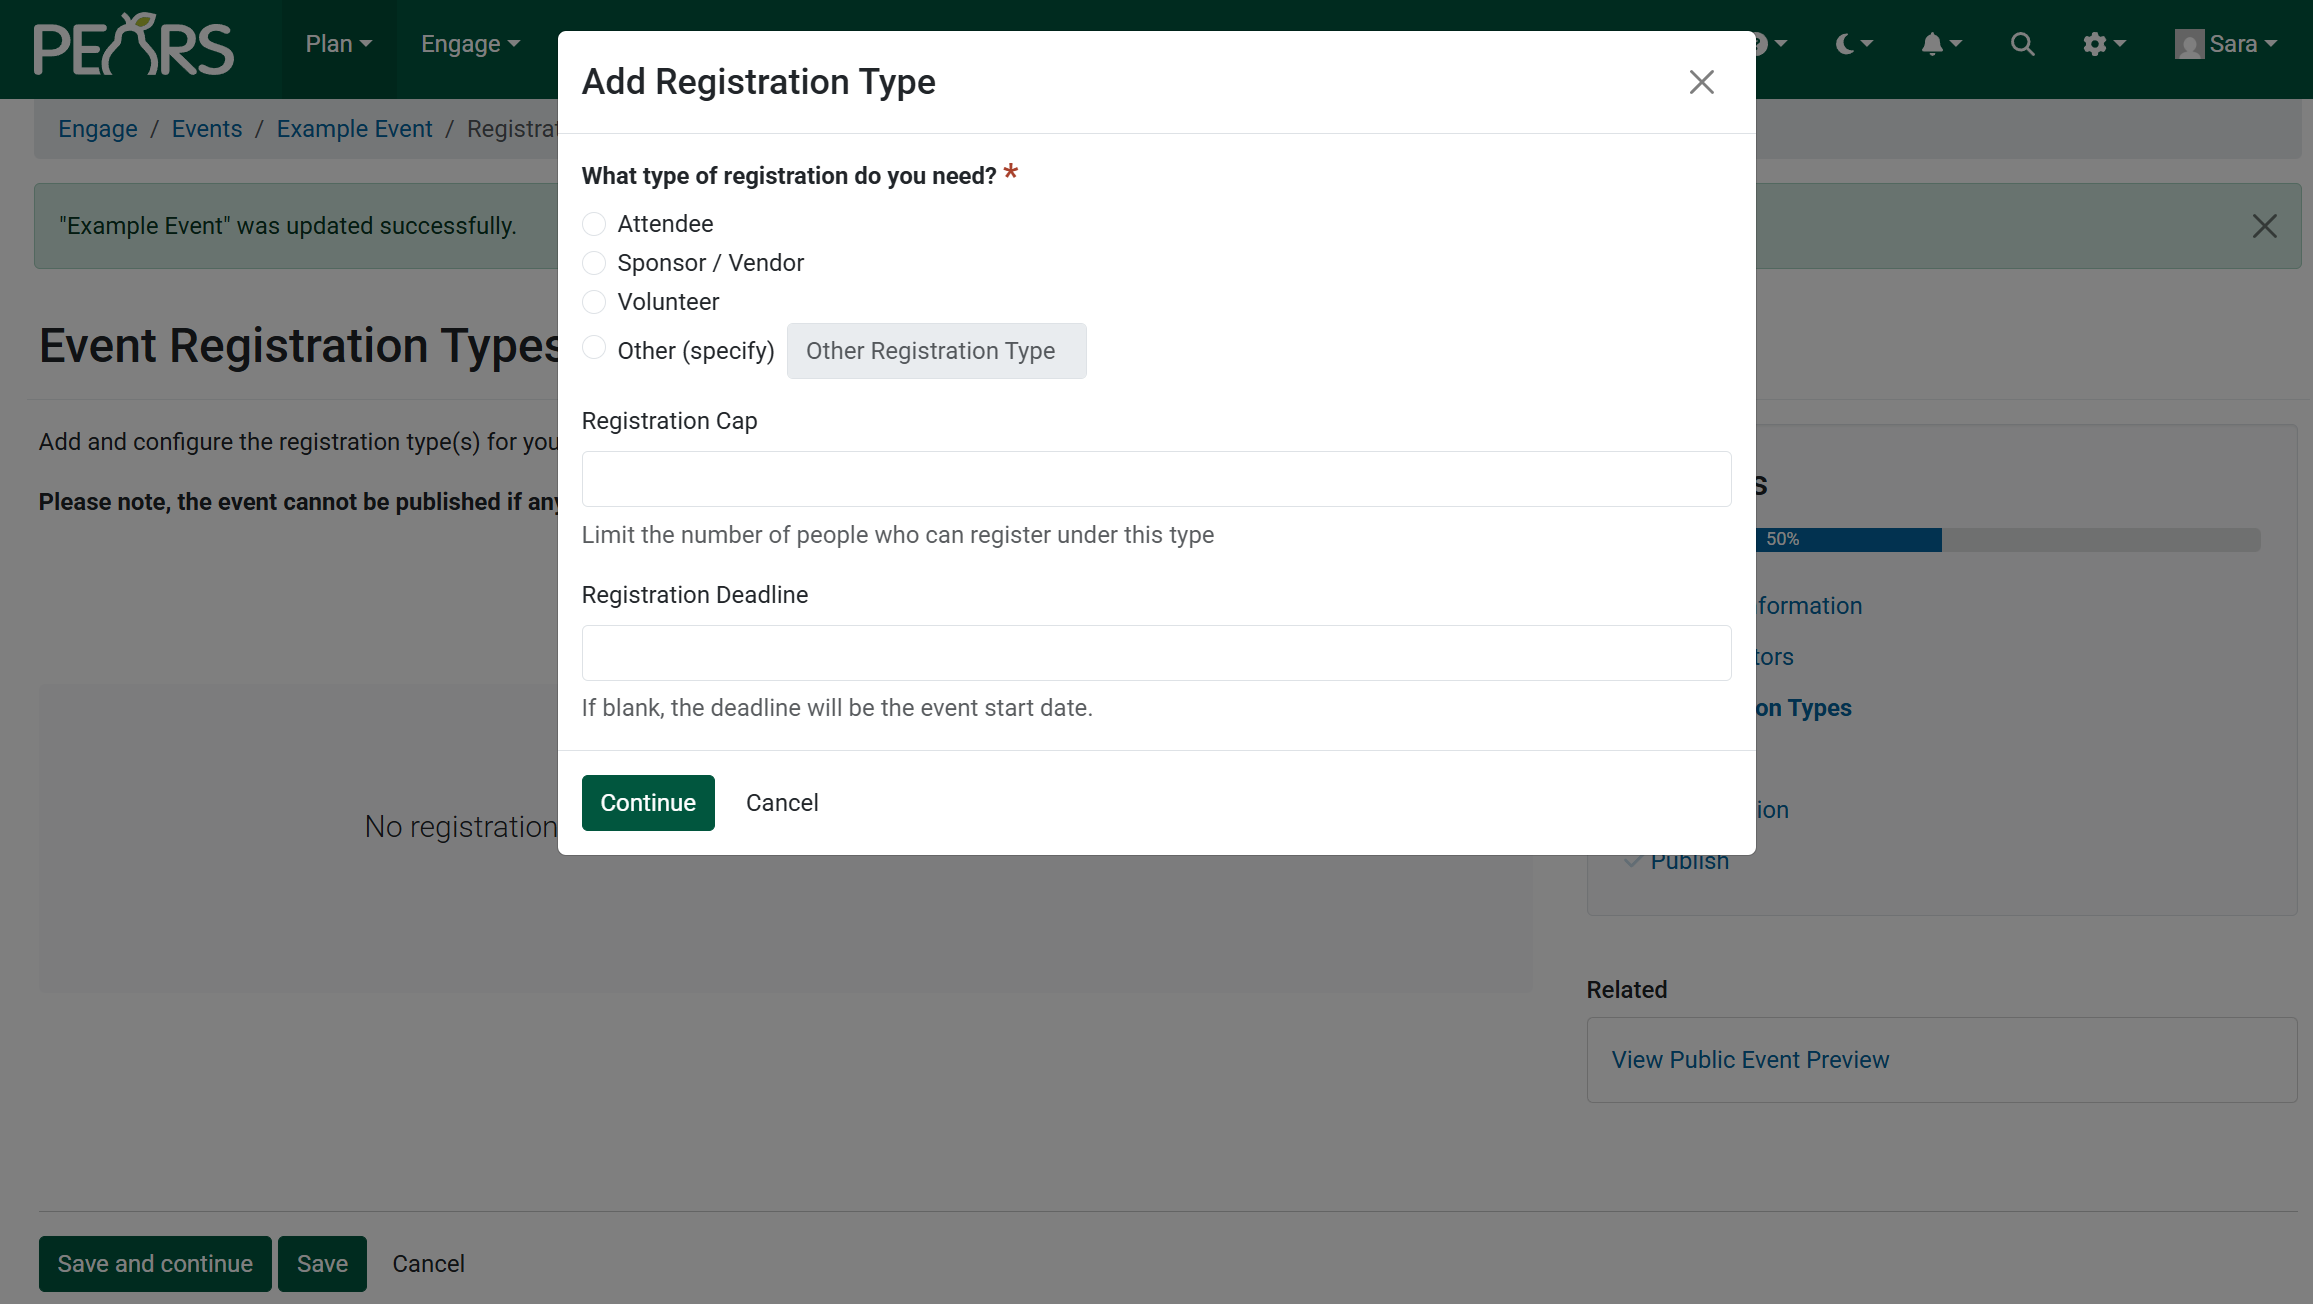
Next is the Event Registration Types page, where specific registration types can be added. Selecting the Add Registration Types button opens a dialogue box where four registration types can be configured (Attendee, Sponsor/Vendor, Volunteer, and Other). Optional fields allow you to set a cap and a deadline for each type.
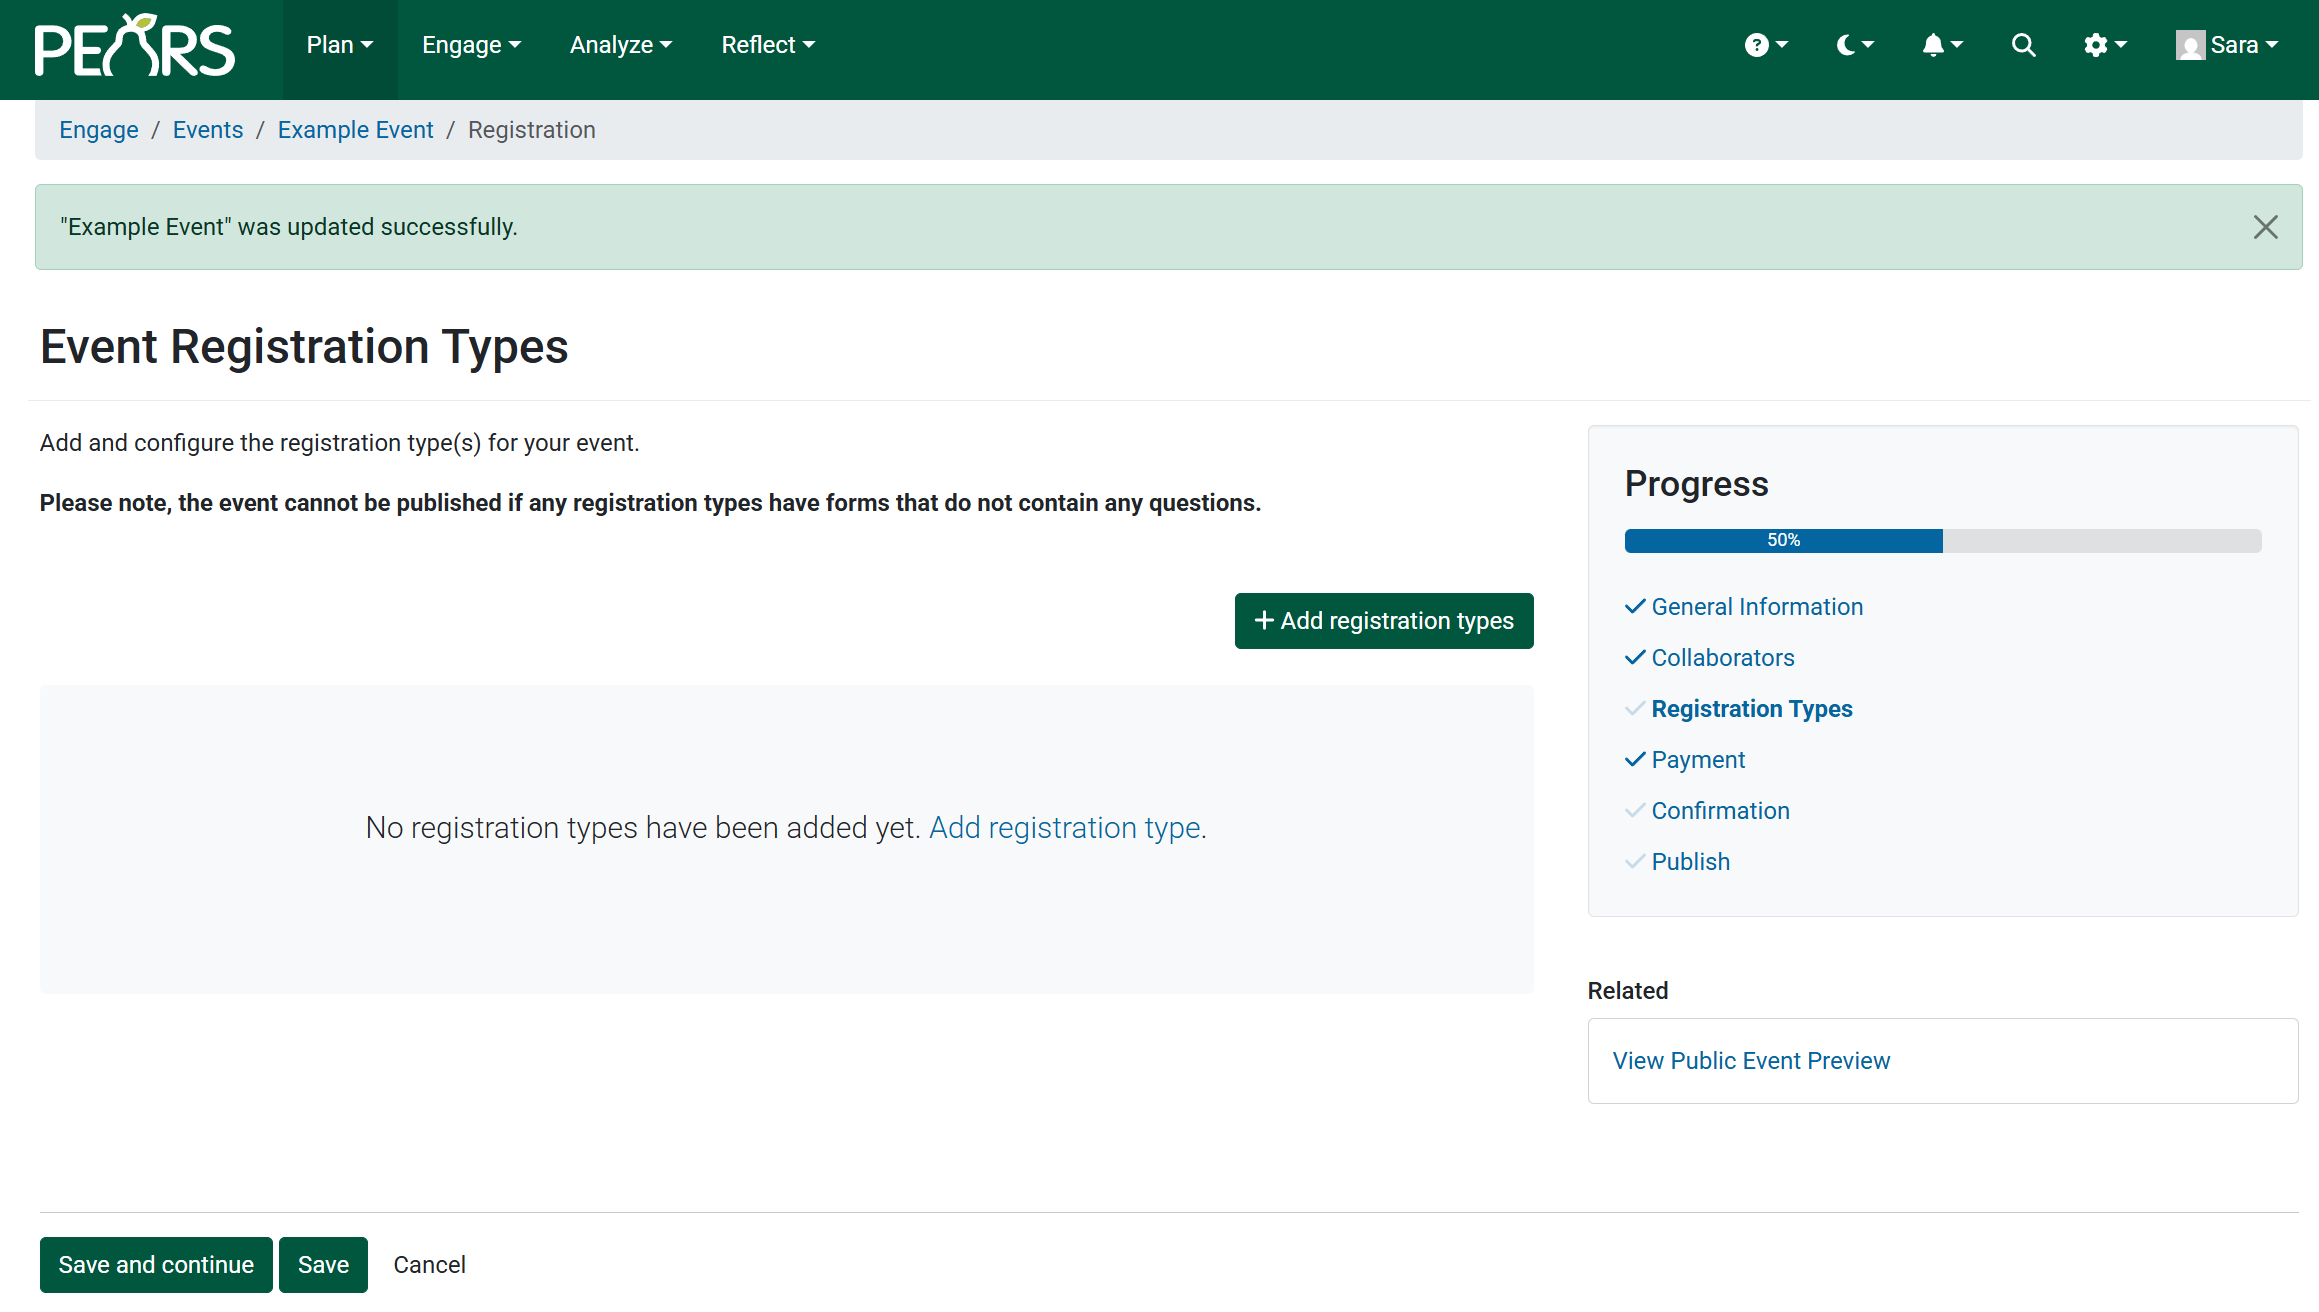
Upon selecting a registration type, you will be prompted to set up the corresponding registration form(s) in a form builder. For more details on setting up your form, please refer to the Registration Form Templates and Blocks document.
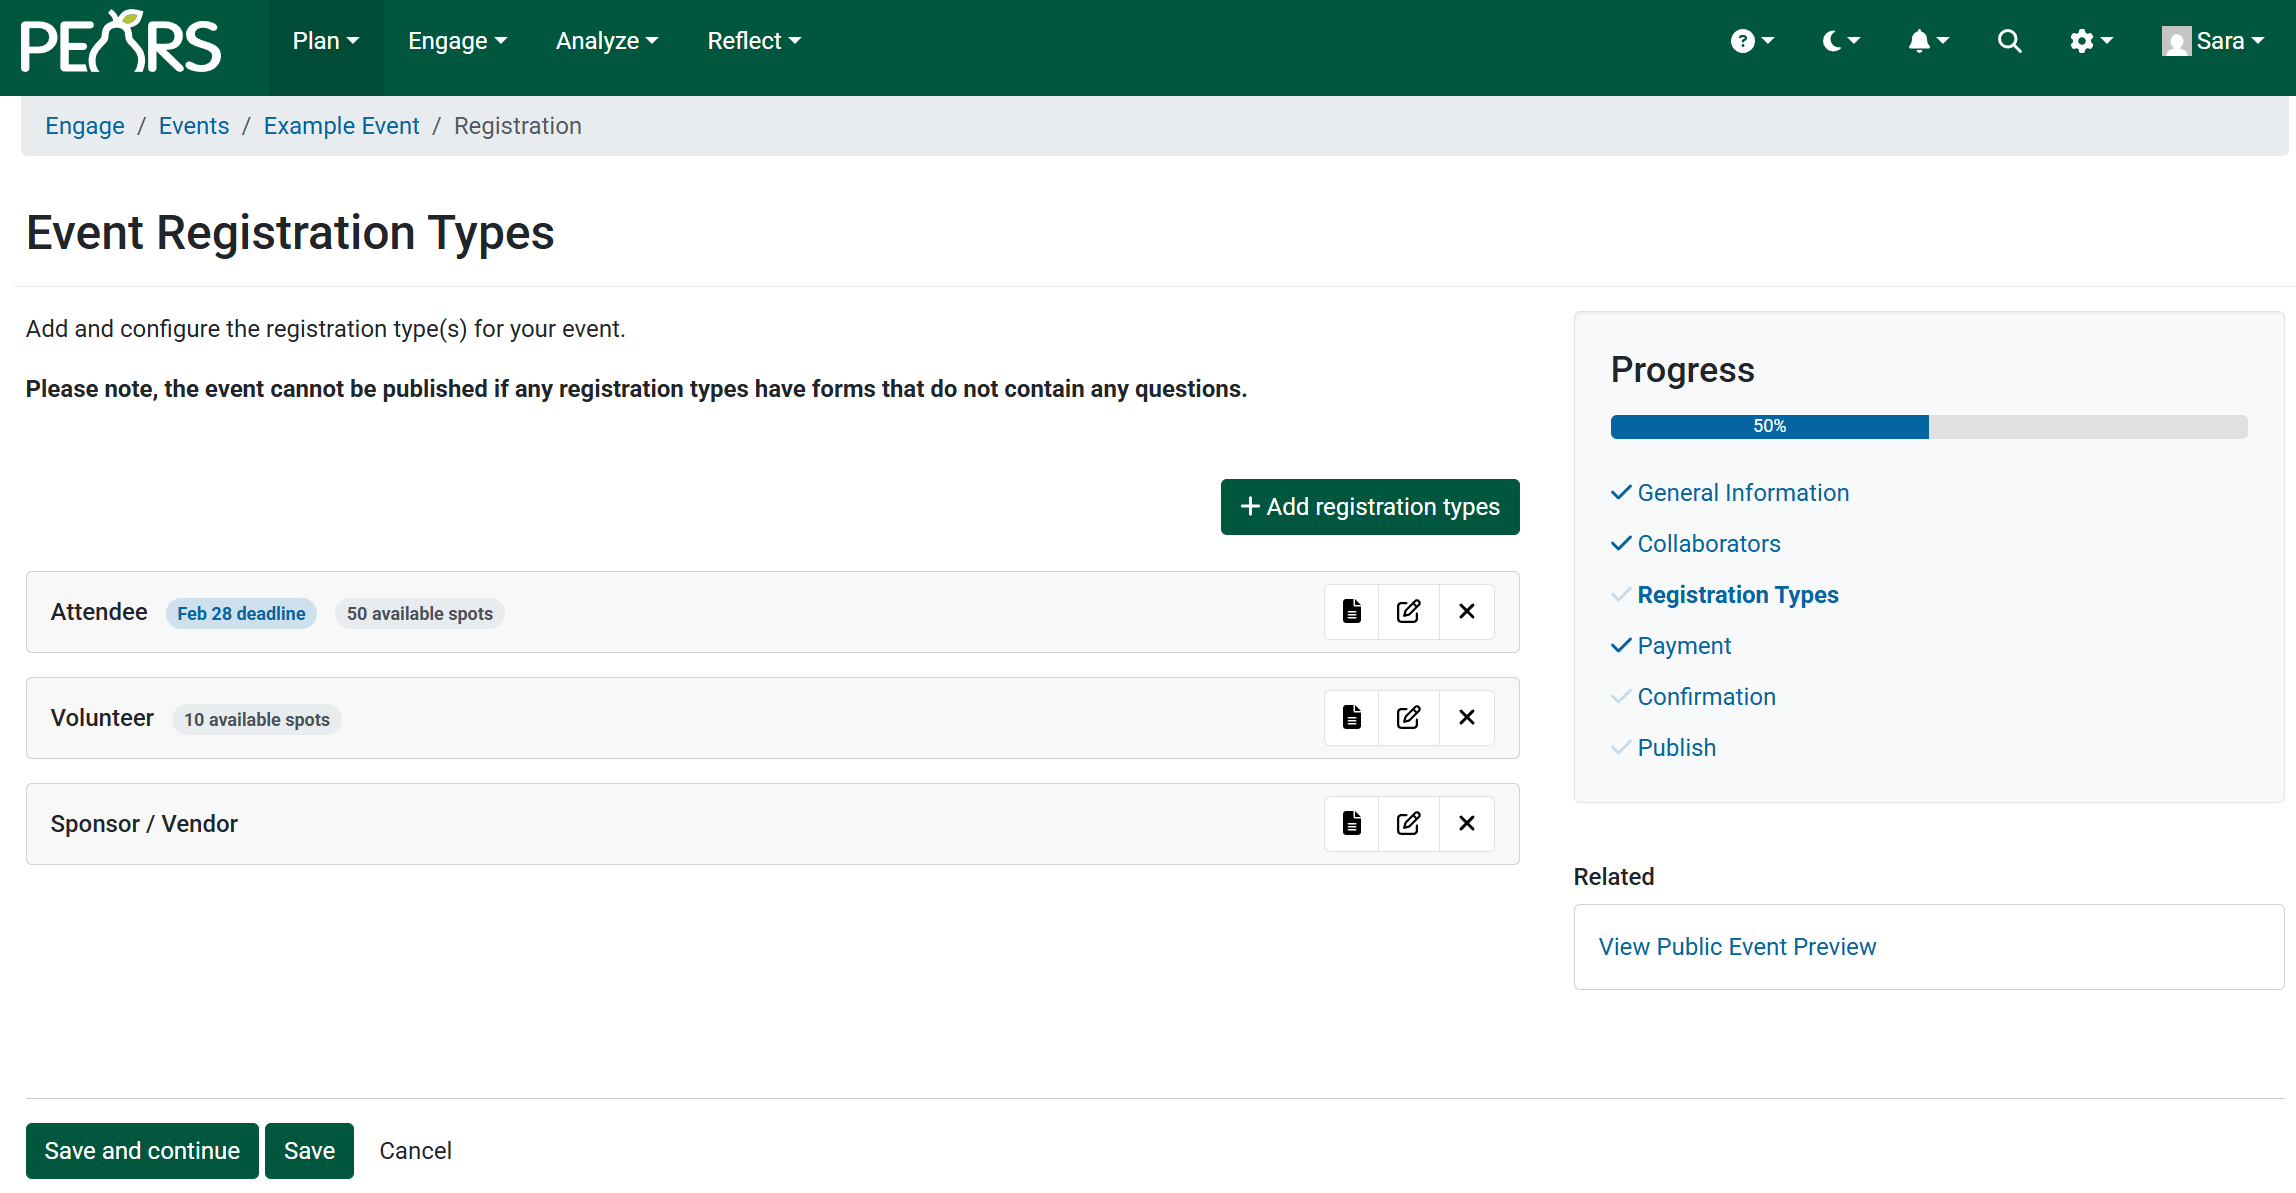
As registration types are added, they will populate into the Event Registration Types page. If needed, you may further edit the registration form, and edit or delete the registration type from this page.
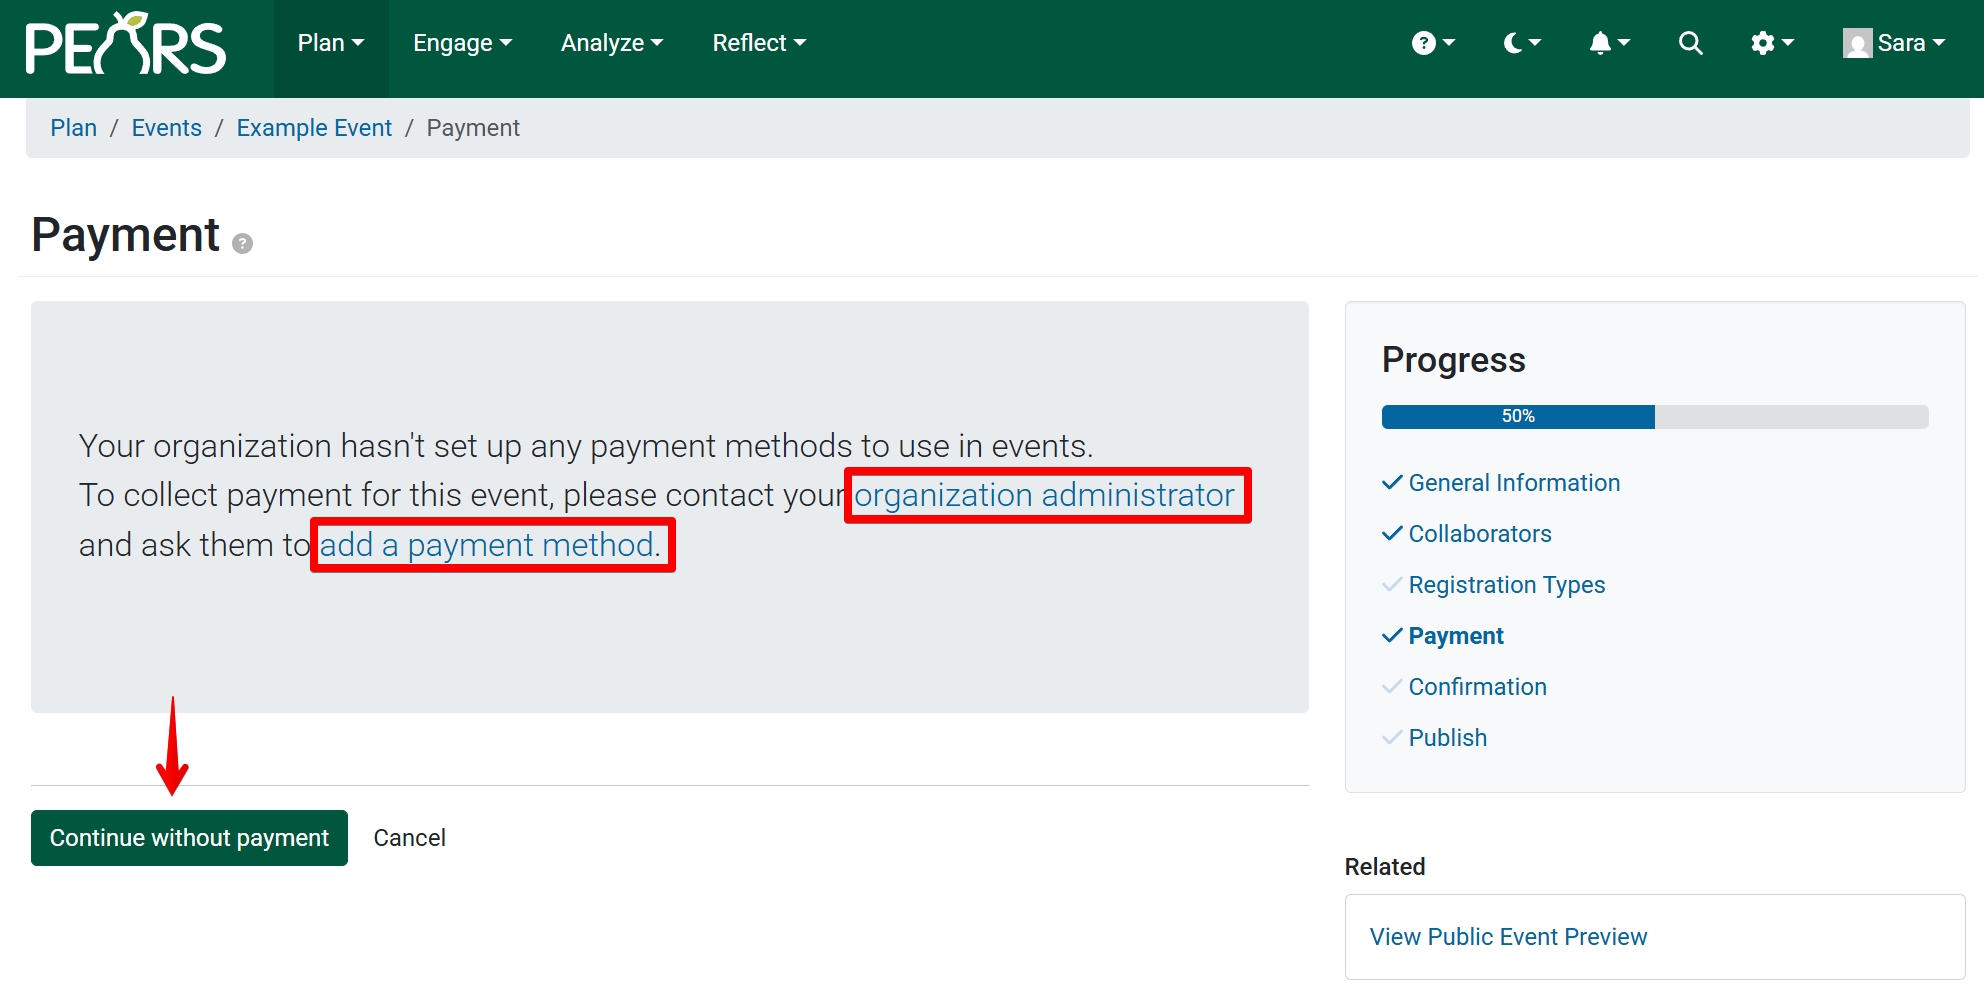
The Payment page is where you will configure payment, if applicable. Depending on whether your event is paid or free, you will either need to a) Contact your Organization Administrator to add a payment method to the system; b) Add a payment method; or c) If your event is free, select Continue without Payment. Refer to the Add Event Payment Options support document for more on adding payment options to an event.
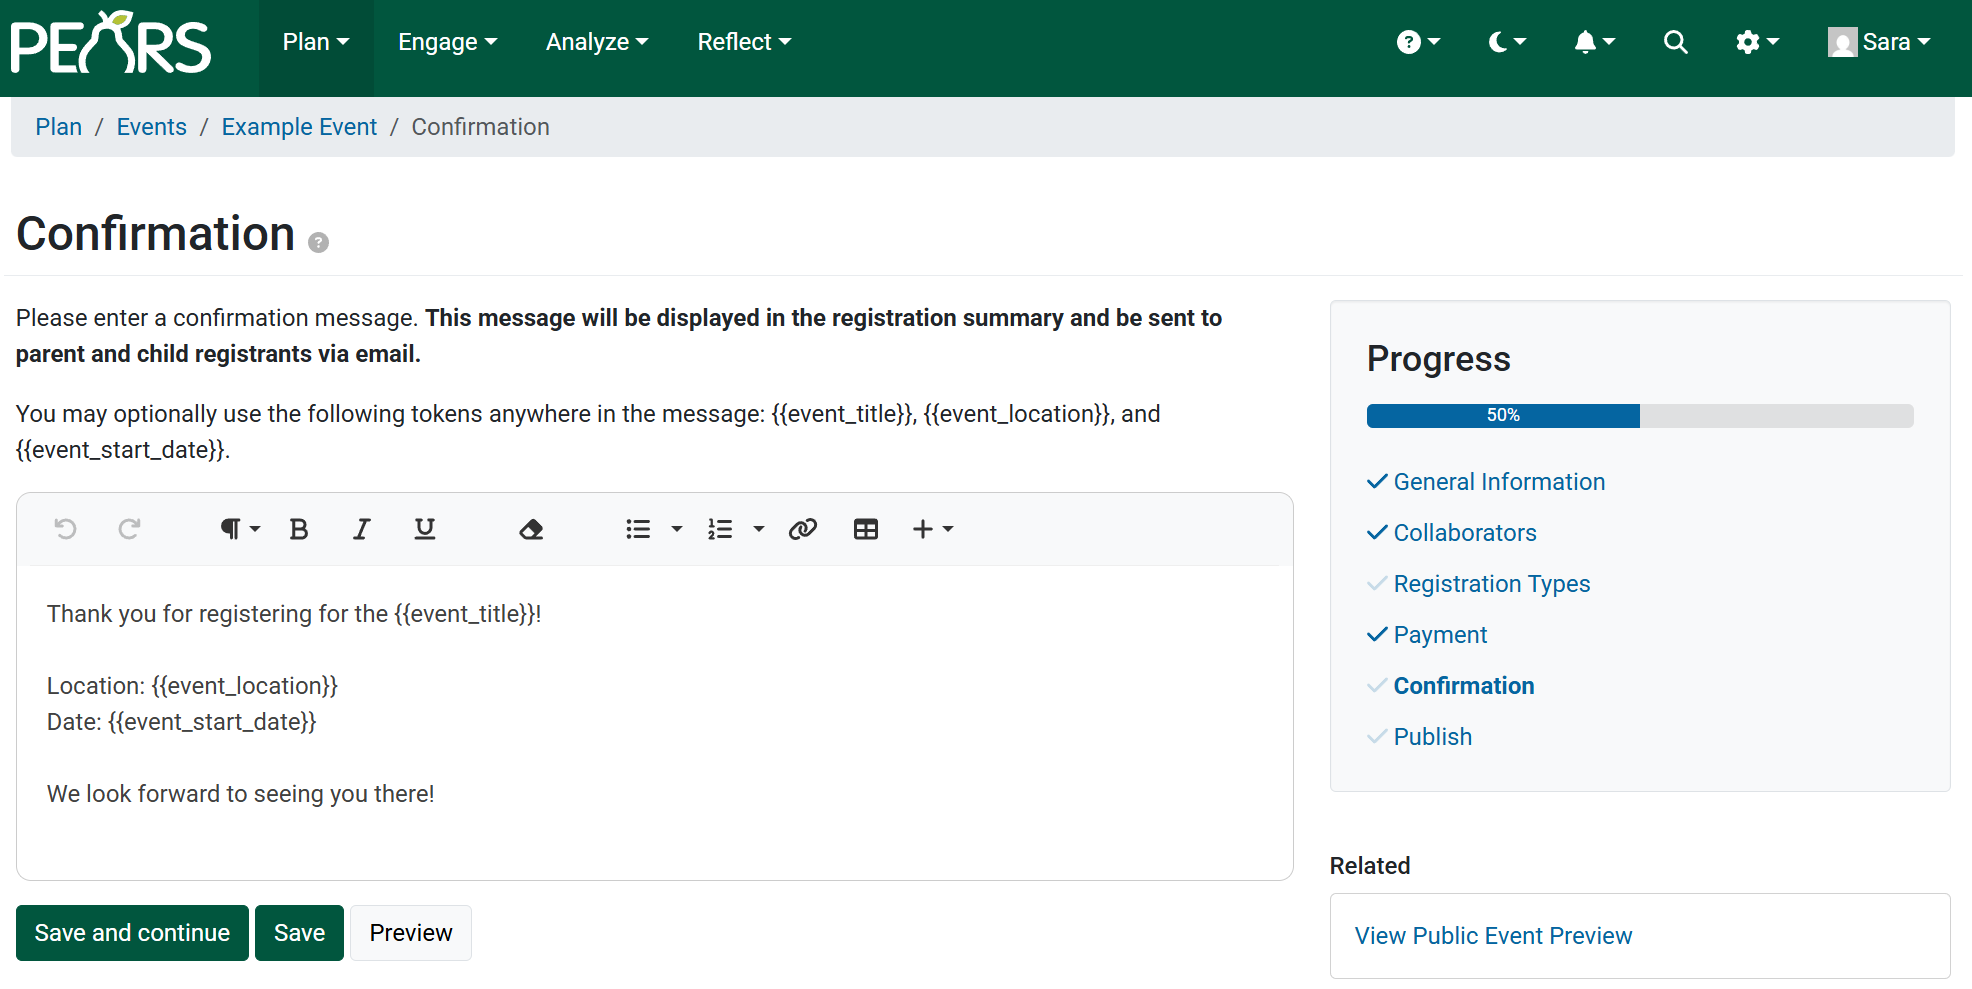
The Confirmation page is where you can customize email text for a confirmation message. This message displays in the registration summary and via email to registrants.
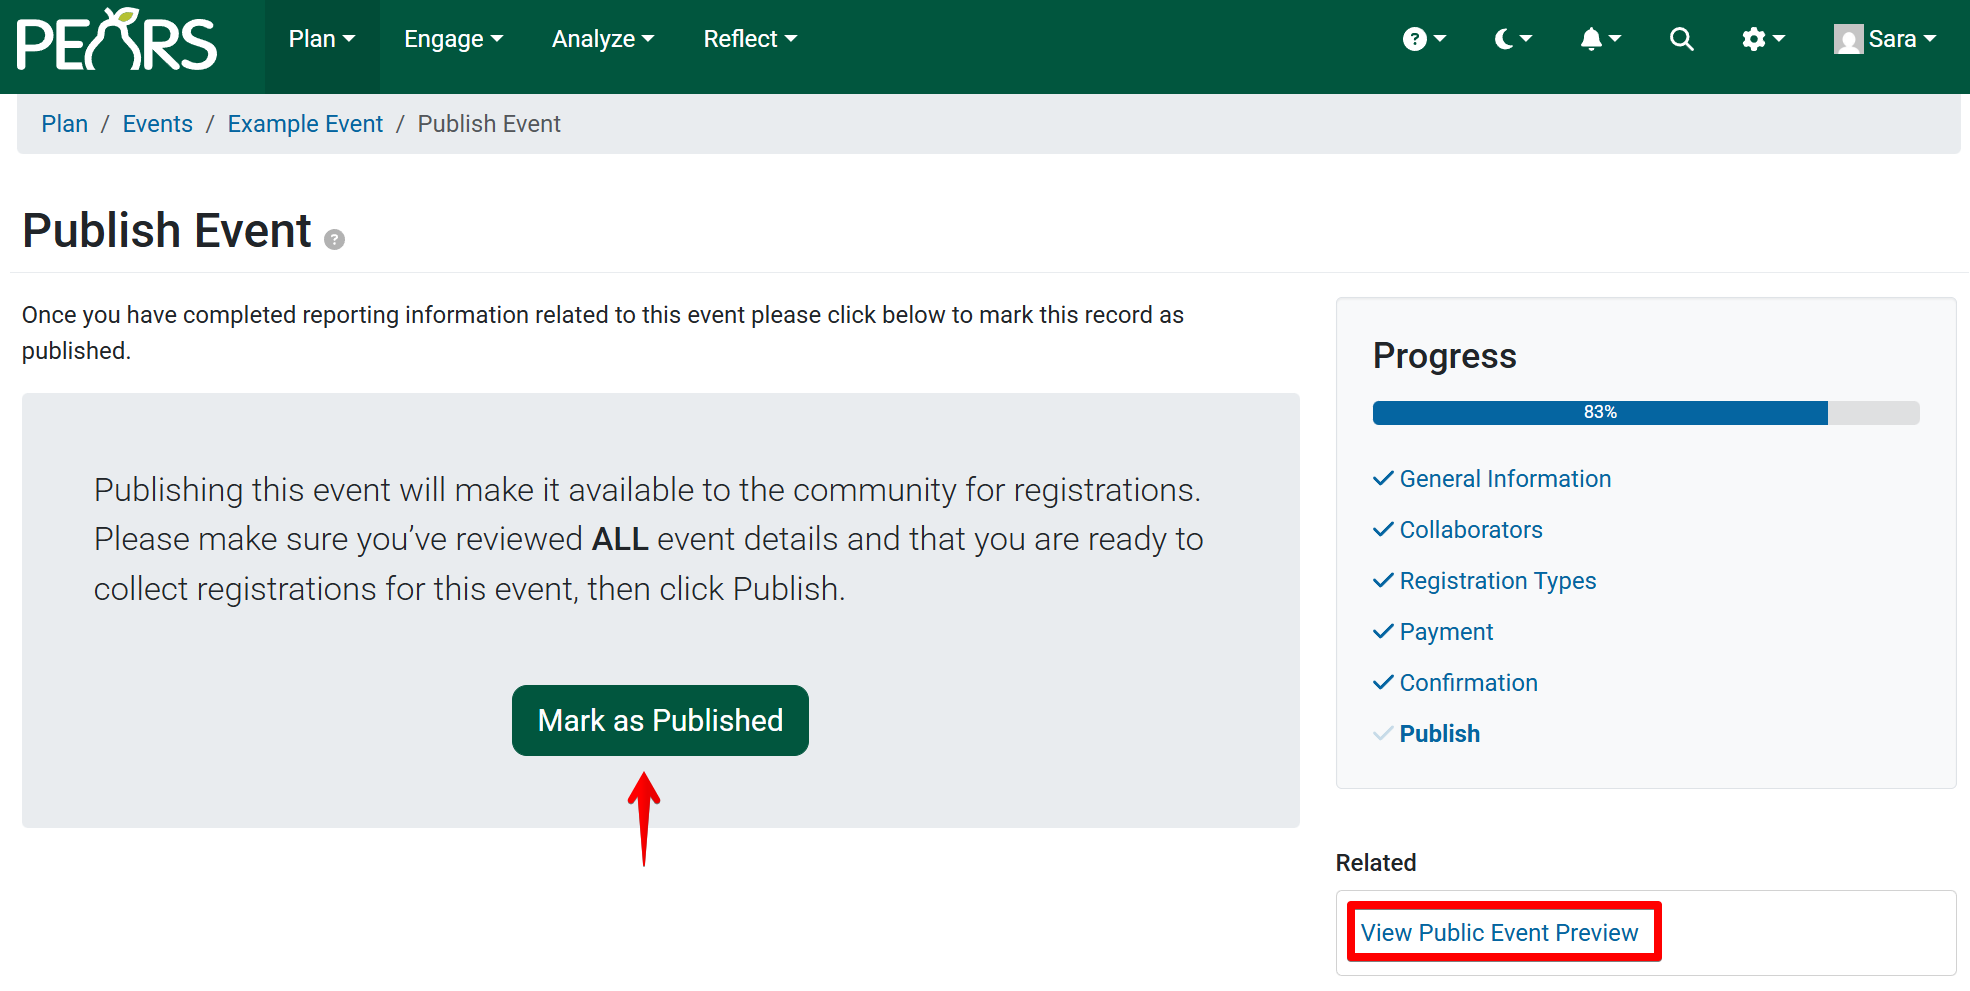
Publish Event is the final step in creating an event. View Public Event Preview is helpful for proofreading your event again before publishing. Once all event data has been entered, click Mark as Published to publish your event to the public-facing website.
NOTE:
In order to access the event module, coordinate with your organization administrator and PEARS Support to be granted the appropriate permissions.
NOTE:
The time zone field defaults to the organization's time zone but is editable if necessary.
NOTE:
If the 'yes' box for multiple sessions was checked while completing the General Information page, those details will be added in the Sessions section, after Collaborators is complete.
See Step #3 for instructions on Sessions.
See Step #3 for instructions on Sessions.
✓ TIP:
At any point in creating your Community Event, you are able to View Public Event Preview by using the link under the Progress pane. We recommend proofreading your public facing texts and images before publishing.
NOTE:
When you create a registration type, you will be able to set a registration deadline. The form will close after the deadline passes.
NOTE:
The event cannot be published if there are forms that do not contain any questions.
✓ TIP:
This textbox includes tokens, e.g. {{event_title}}. Tokens can be used to insert conditional text for this specific event. This allows you to keep a standard format for confirmation messages.
If you would like to add more, you can find all token options under the + in the ribbon of the text box.
Tokens can be formatted using: bold, underline, and italic.
If you would like to add more, you can find all token options under the + in the ribbon of the text box.
Tokens can be formatted using: bold, underline, and italic.
NOTE:
Before you are able to publish your event, PEARS checks that all Event setup criteria have been met. If a message indicating any missing event data displays, refer to the progress pane and click any missing checkmarks to return to the sections with missing data.
NOTE:
If your event is marked as private in the General Information section you will still need to publish the event. Once it's published, you will have a link to share that event internally.
NOTE:
Some Event Creators won't have permission to publish events to the public facing website. You may need to utilize an Event Publisher or Event Administrator in your organization in order to publish your event.
NOTE:
Once an Event is published, you can mark it as a Draft which takes it down from the public site. This can be done on the final screen shown to the left. Choose the red Draft button.