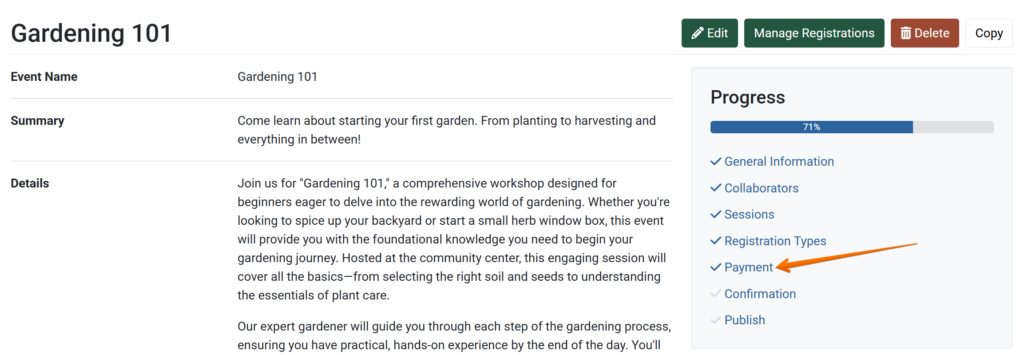
Navigate through the Plan menu to the Community Events module. Navigate to the Payment section to set up payment options.
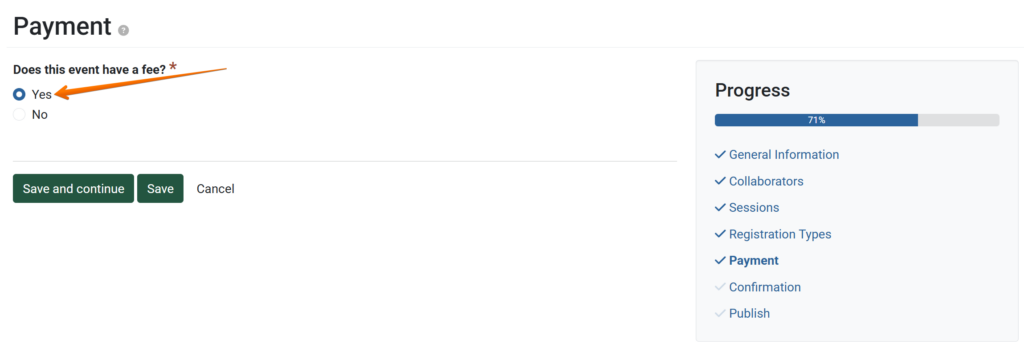
On the Payment page, indicate that the event has a fee. Additional payment settings will appear after saving the page.
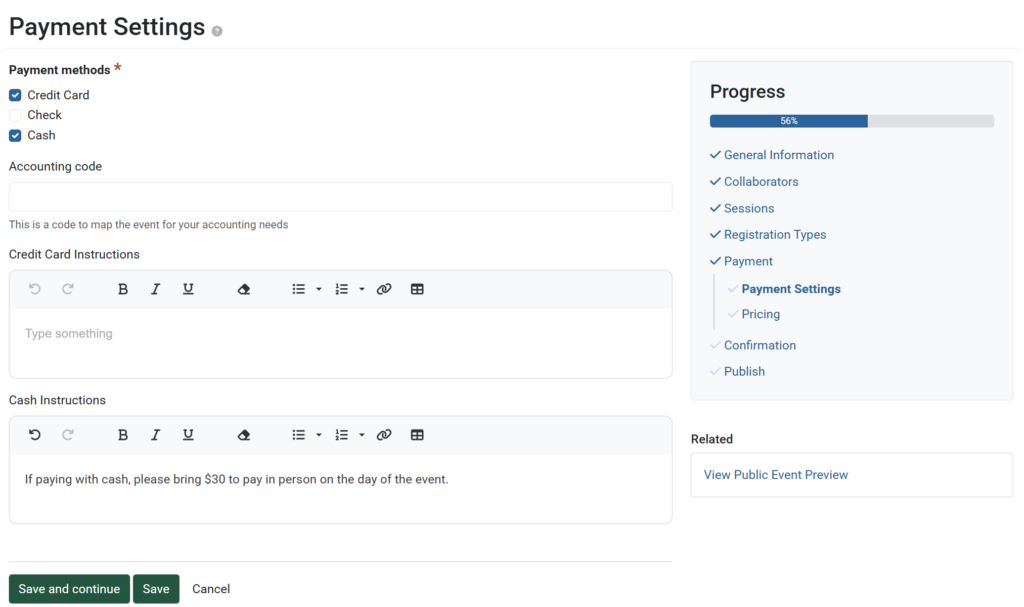
On the Payment Settings page, select which payment method(s) will be accepted for this event. Optionally, add instructions for each payment option. Optionally, include an accounting code to associate with payments for this event in the Excel export.
On the Pricing page, set the registration fee.
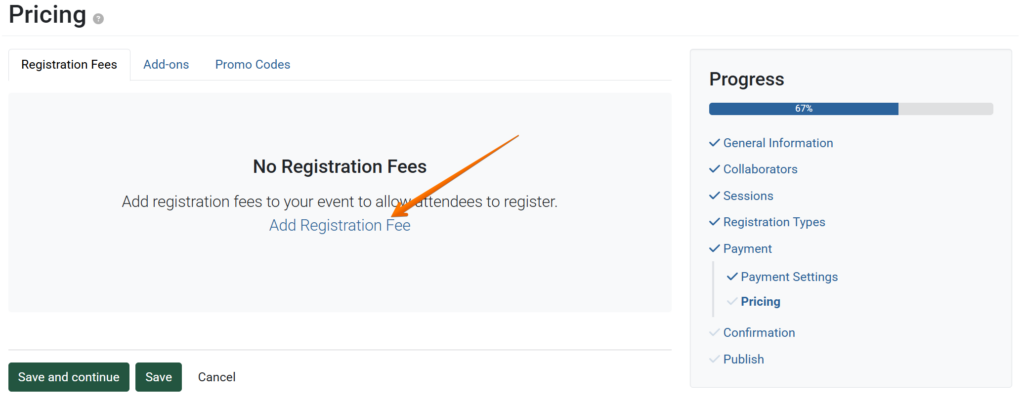
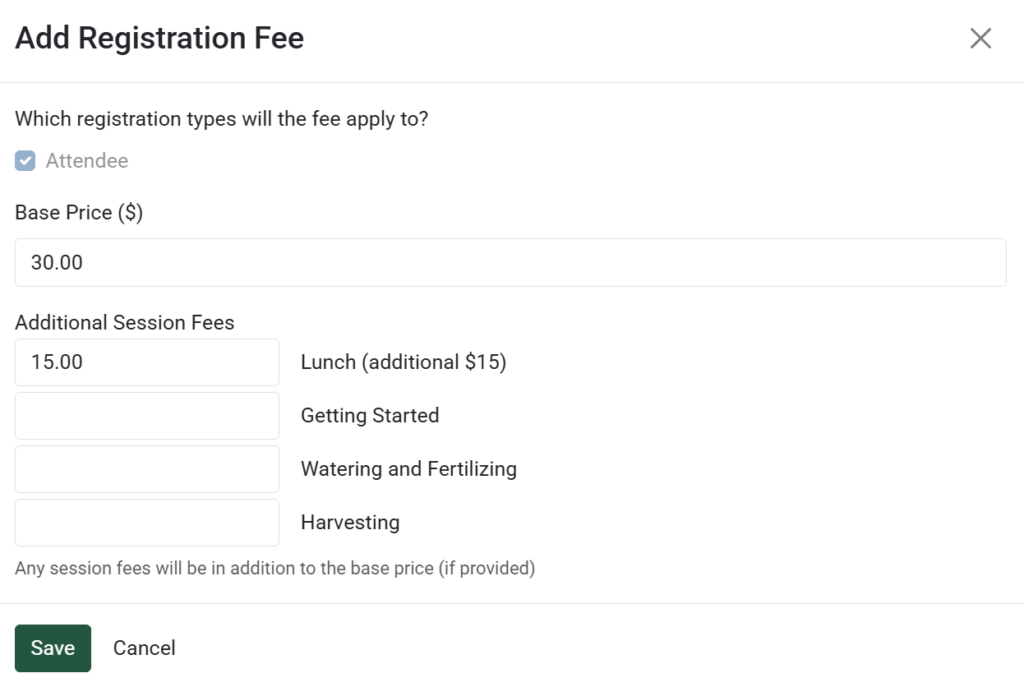
Add a base price for event registration. If needed, set additional fees for individual sessions.
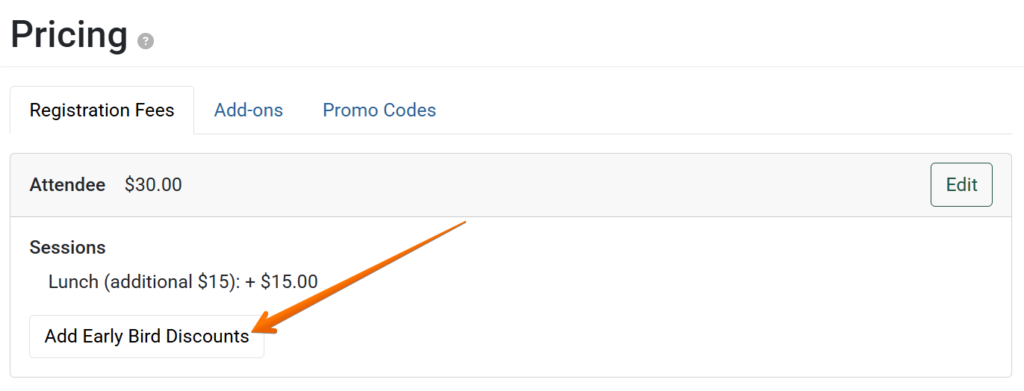
After saving a registration fee, optionally use the Early Bird Discount option to add date-based discount(s).
Date-based discounts can be a percent or a set dollar amount: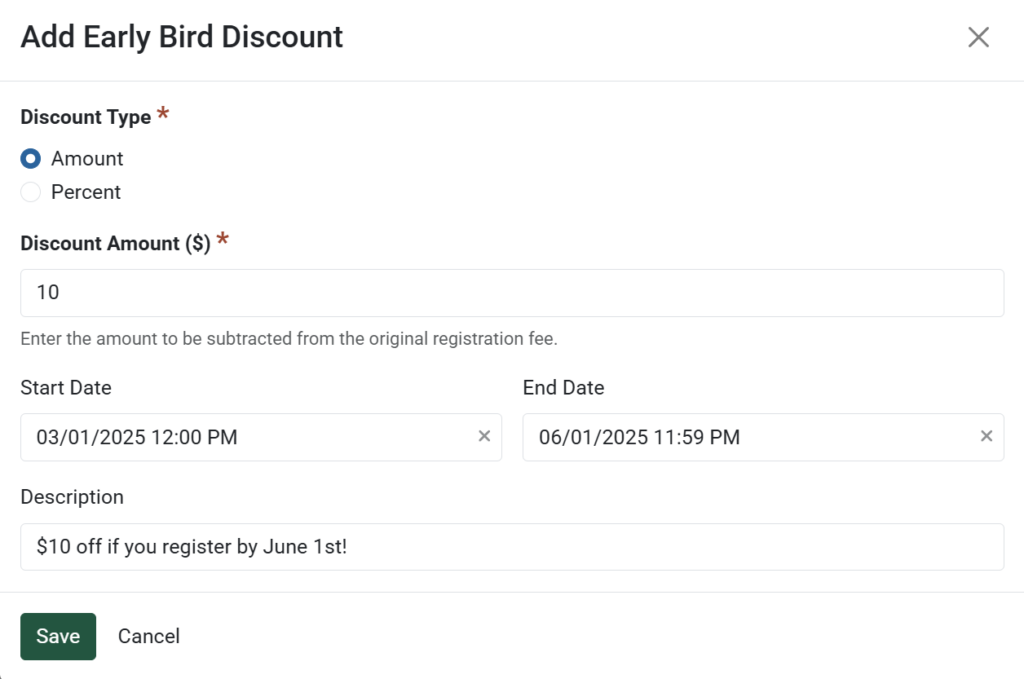
Optionally, set up pricing for Add-on purchases, such as course materials or merchandise.
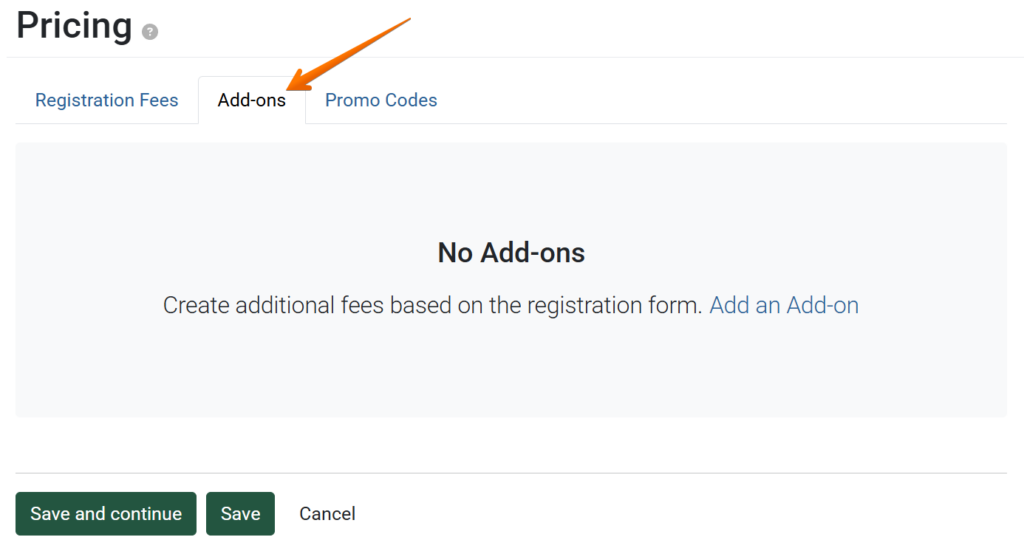
Add-on pricing can be set for questions within the registration form: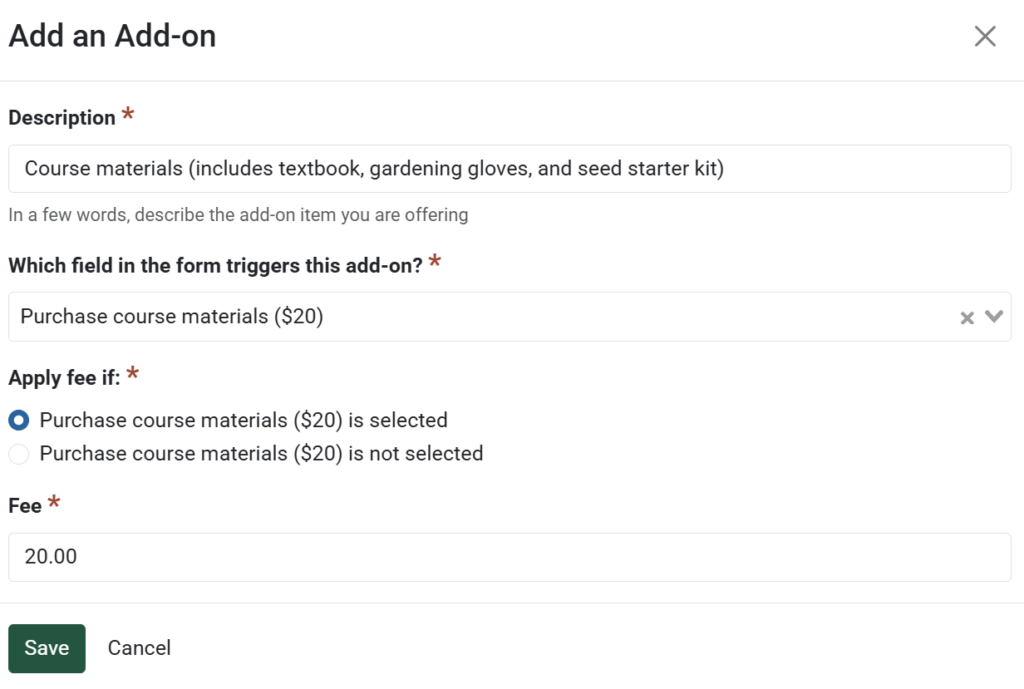
Optionally, set promo code(s) to provide discounted pricing.
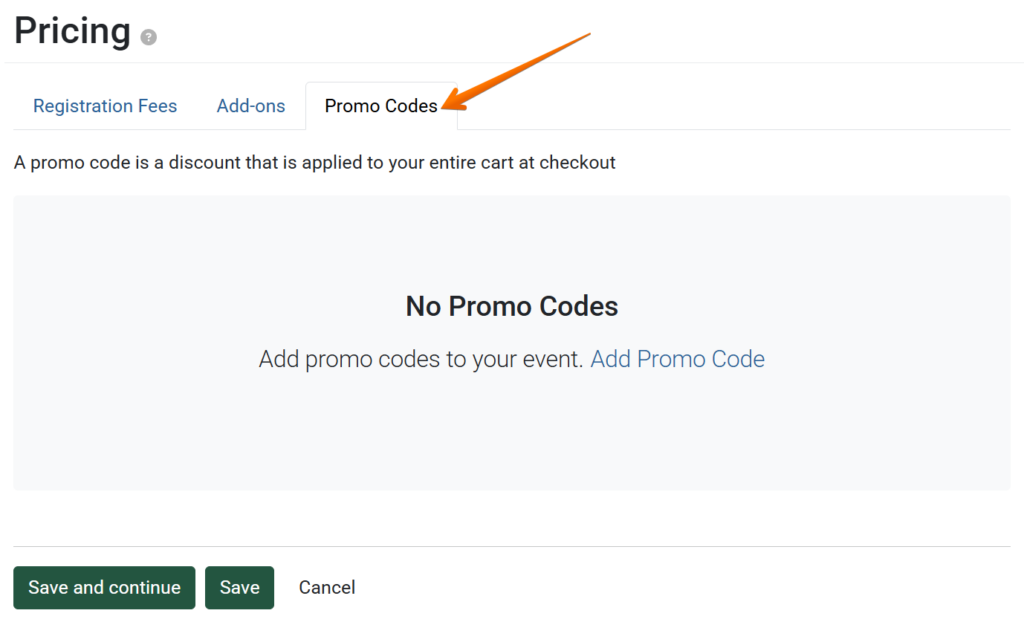
Promo codes can be a percent or a set dollar amount: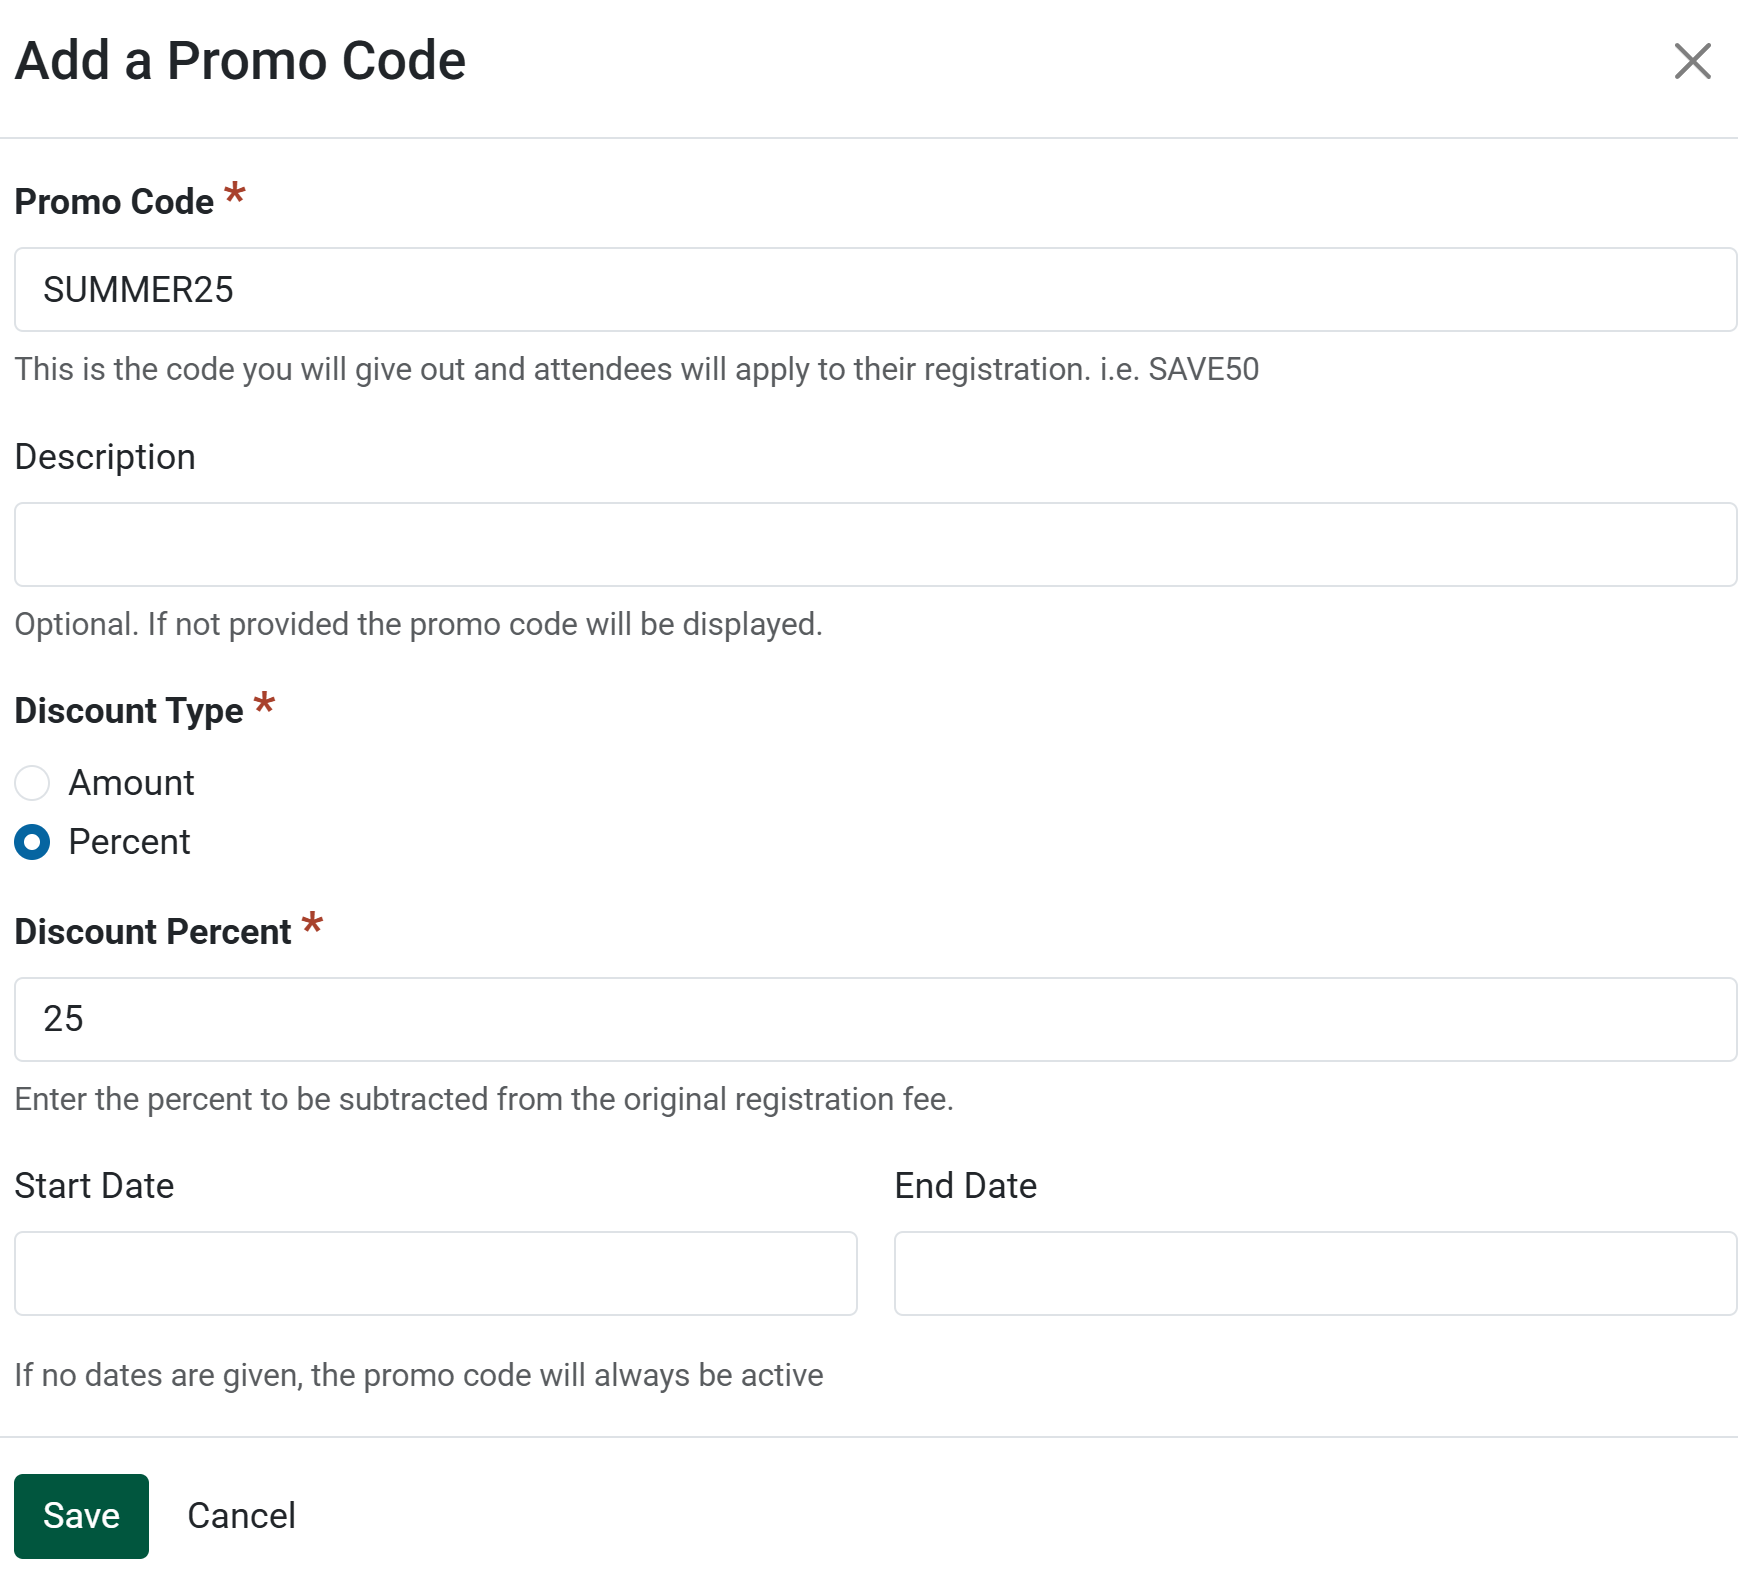
NOTE:
In order to access the events module, coordinate with your organization administrator to be granted the appropriate permissions.
NOTE:
If additional payment methods are needed, please coordinate with your organization administrator to add to the list of available options.
NOTE:
Registrants will see the respective instructions for the payment option selected during the registration process.
NOTE:
To modify the registration form, go to the Registration Types section. Add-ons can be created for registration questions that provide choice options (e.g. a checkbox, single-select field, multi-select field, toggle, etc.).